Getting Started
Description
Estimated time required: 5 minutes
Following the tutorial below, you can set up your first NeoMesh network.
Required hardware
- 2 NeoCortec Evaluation boards
- 2 USB cables
Required software
- NeoCortec Config_App (Supplied on your USB card)
Getting started
-
Insert the USB stick to PC, and double click the “run_me.bat” file to start the Launcher Application. This will give you access to a host of tools and useful documentations for your NEOCORTEC evaluation board.
-
Connect two NEOCORTEC evaluation boards using the supplied USB cables to your PC.
-
Click the “Launch CONFIG APP” logo to start the software for configuring one of the modules connected to the PC. You can open multiple instances of the config app by clicking the button multiple times.
-
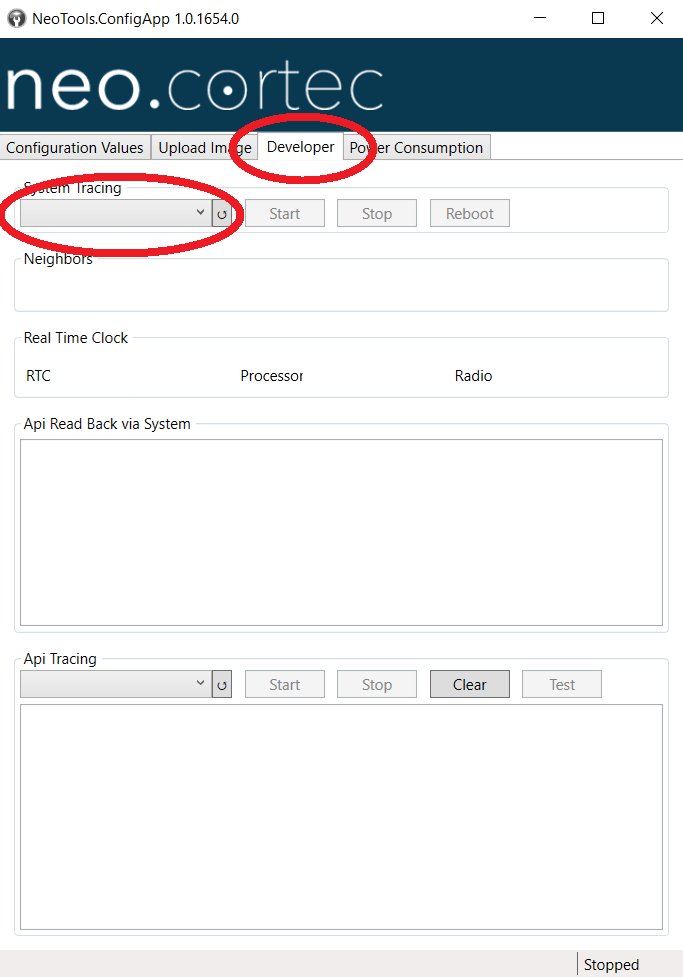
Click the “Developer” tab on the top right of the configuration app window. On the “Developer” tab, select a com port on the drop-down list. There should be two ports listed. If not, try to click the refresh button next to the drop down list.
-
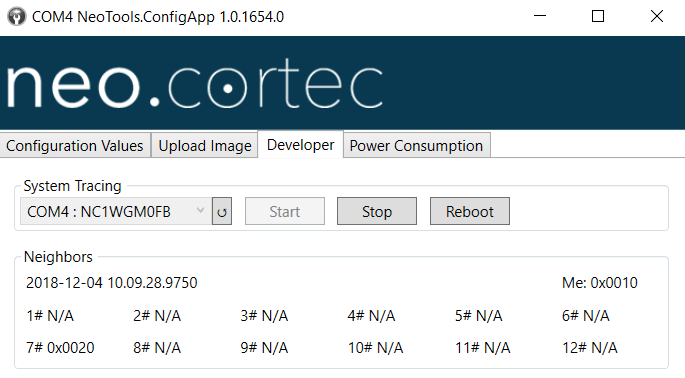
Click the “Start” button to start viewing the neighbor list from the connected board. If you have multiple instances of the configuration application open, connecting to different boards you can see, that both devices list the other one as their “Neighbor”. In the NeoMesh network, a “Neighbor” is a device with whom you have a direct radio link. More about this in the User guide.
“Ooops that didn’t work”
-
Congratulations! You have set up your first NeoMesh Network! Continue with sending messages through the network.