Wireless Encrypted Setup
Description
Estimated time required: 15 minutes
Following the tutorial below, you can set up a node wirelessly in an already existing NeoMesh network.
Required hardware
- 2 NeoCortec Evaluation boards
- 2 USB cables
Required software
- NeoCortec Config_App (Supplied on your USB card)
- NeoCortec Demo_App (Supplied on your USB card)
WES mode start
-
If we wish to add a new node to an already existing network without the need of setting the new device up manually, we can use the "wireless encrypted setup" (WES) functionality.
The following infographics demonstrates the process step by step.1. 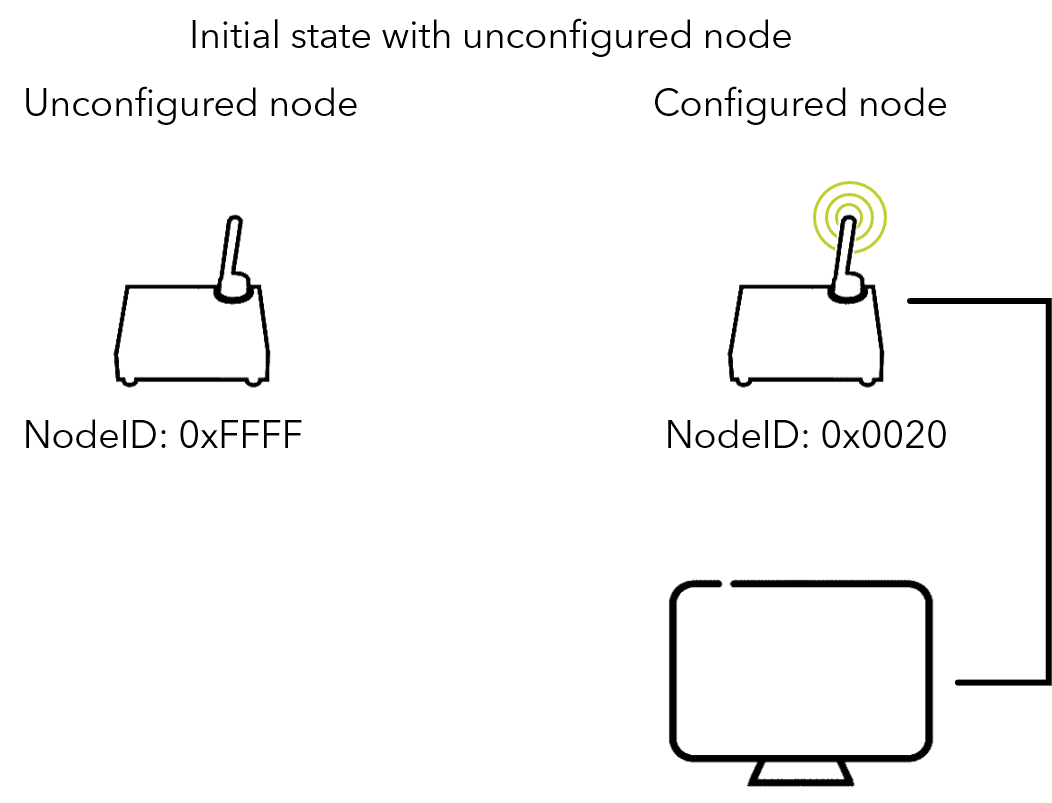
2.
3.
4.
5.
6.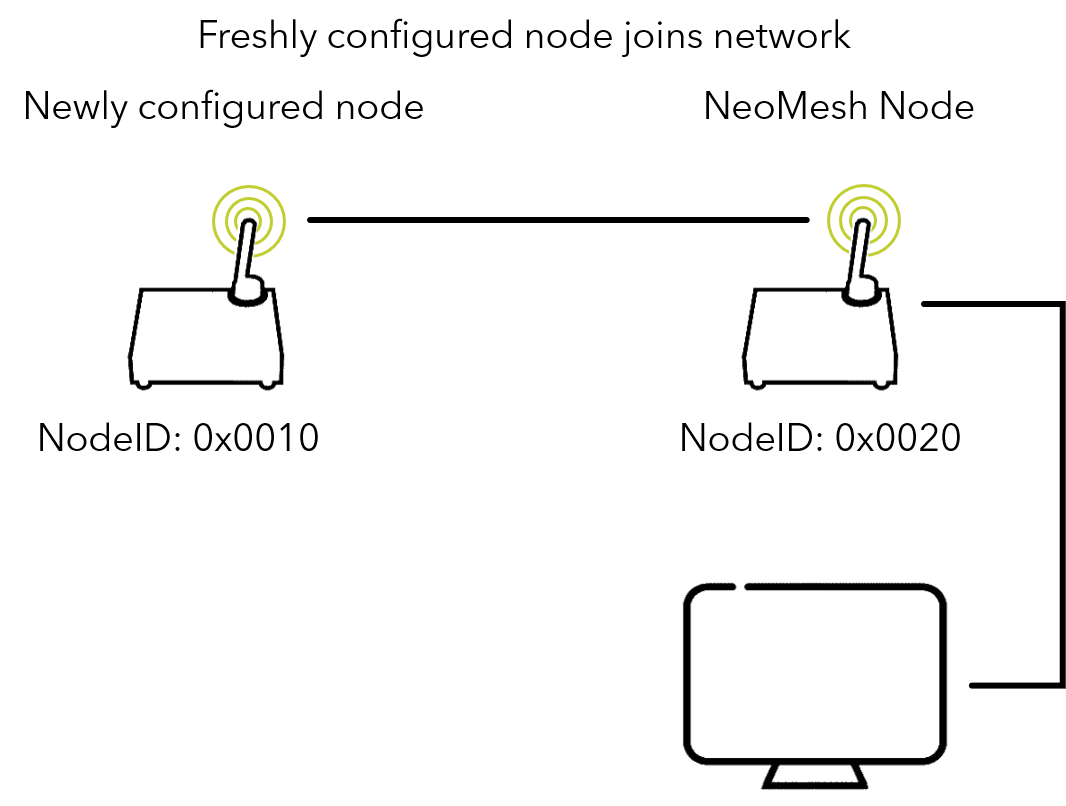
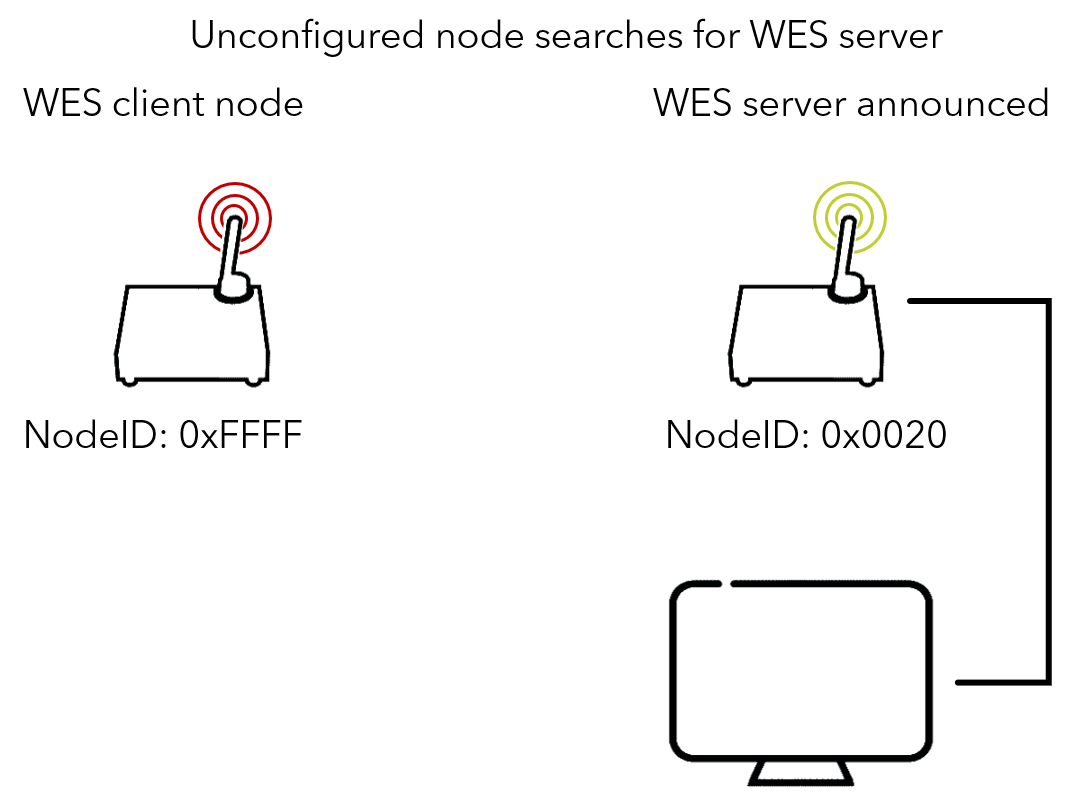
- WES server is announced.
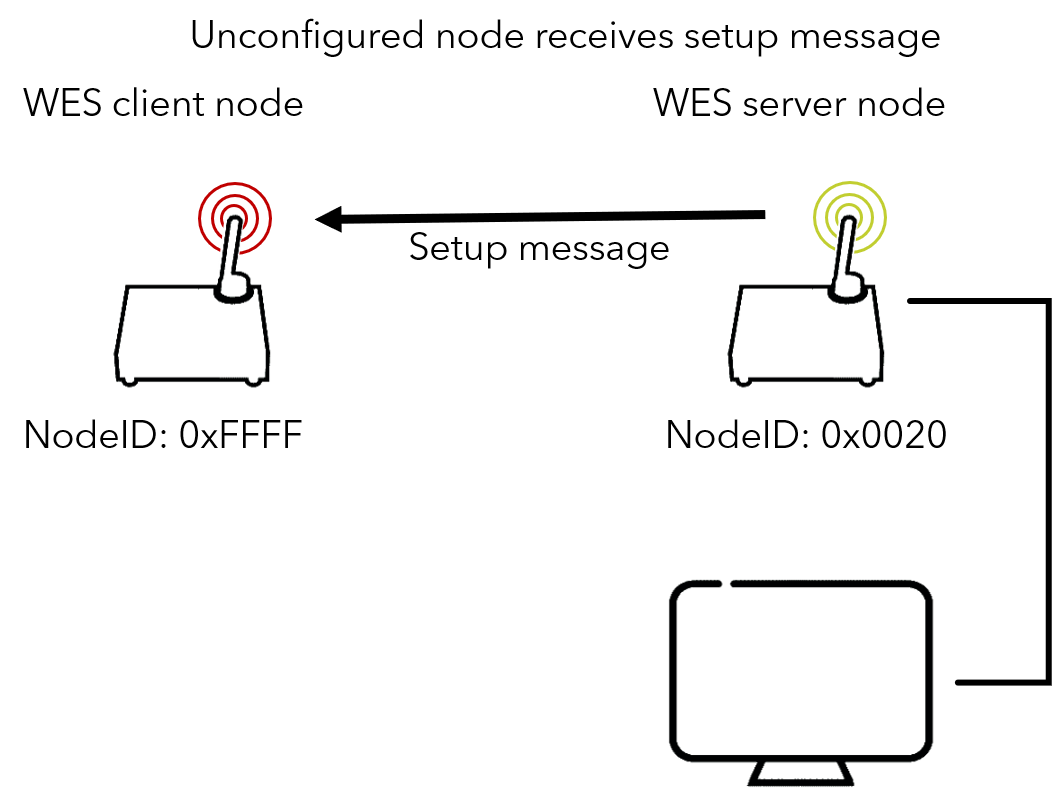
- WES client node detects WES server and sends setup request.
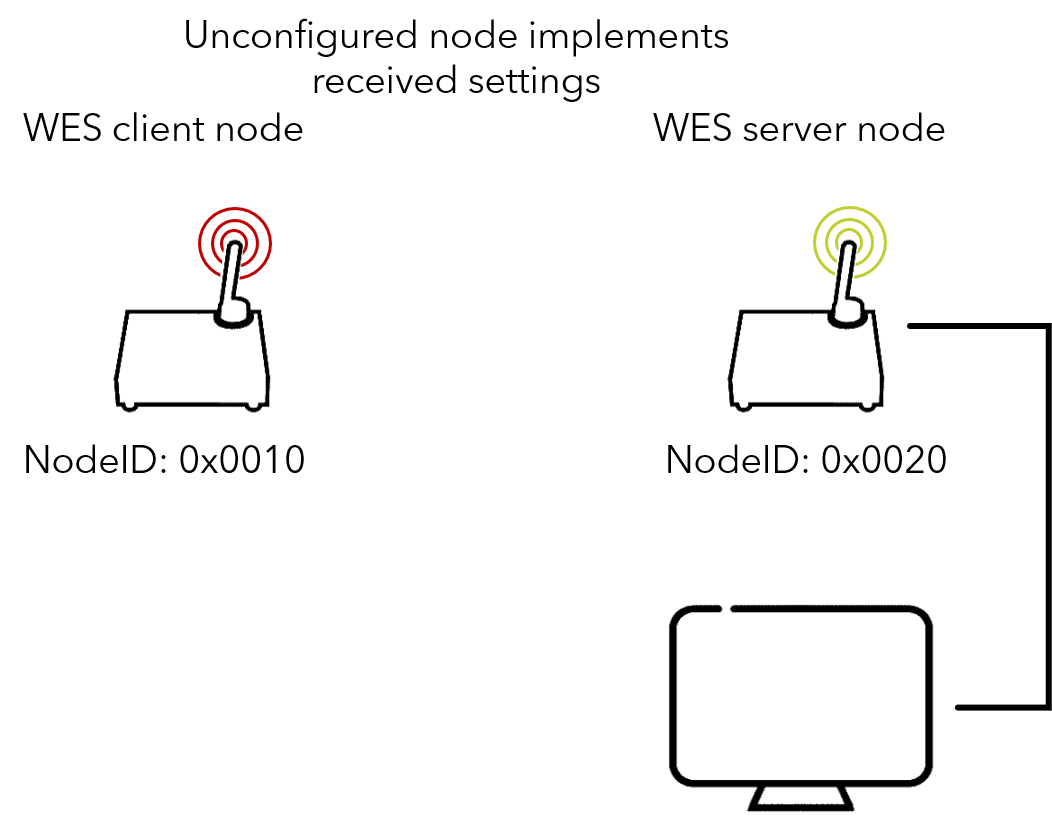
- WES server responds, and gives new NodeID to client node
- Client node becomes part of the network.
-
The addition of the new device starts by it entering into WES mode. The module will automatically enter WES mode if the node ID assigned to it is 0xffff or the WES pin is pulled high.
- For the sake of this tutorial, let us assume, that the to-be-configured new node has the Node ID of 0xffff.
We have to set this ID manually through the “Config App”, following the guidelines here.
“Ooops that didn’t work”
- Once the Node ID is successfully reset, let us connect a correctly configured, operational evaluation board to the computer. For the remainder of this tutorial, we will assume that the node ID for this module is 0x0020.
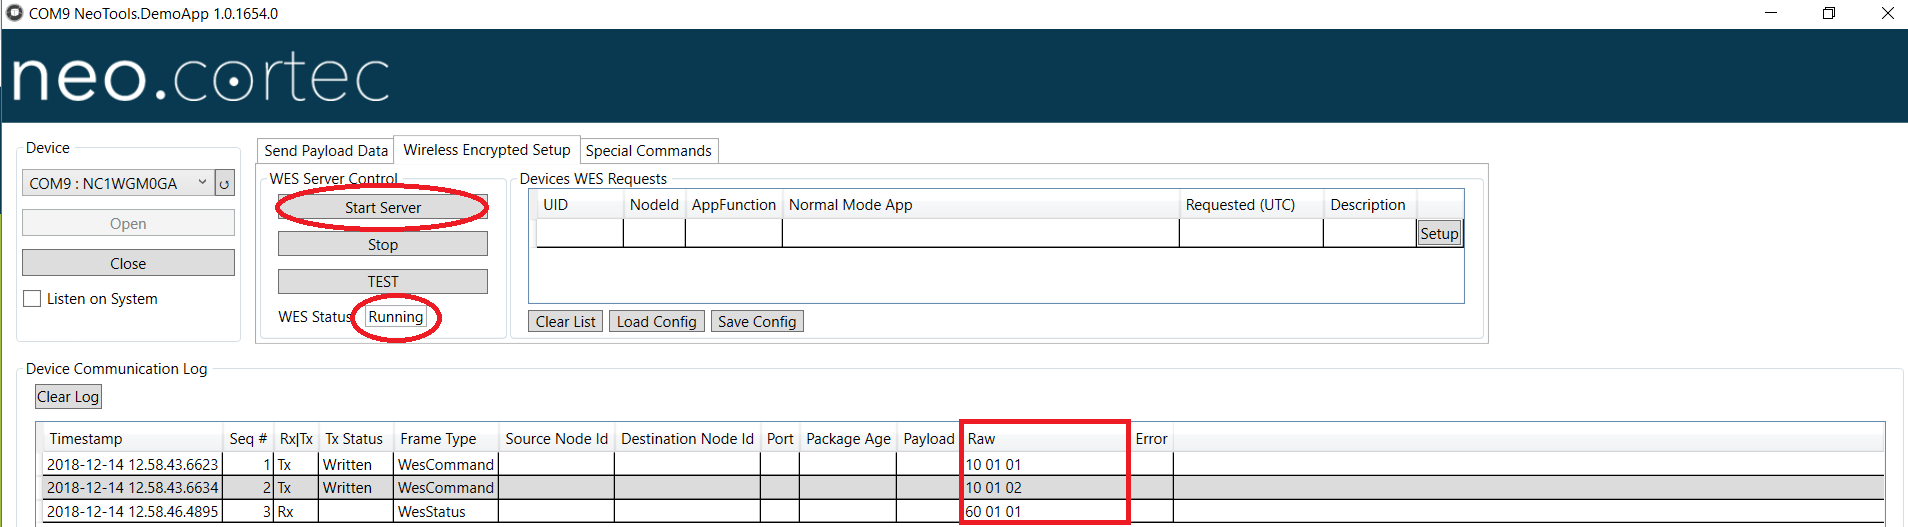
- We shall open an instance of the "Demo App" for node 0x0020 and go to the "Wireless Encrypted Setup" page.
-
Clicking the "Start Server" button will initialize the WES beacons on the board connected to the computer. By this time, the node configured in step 3. is already in WES client mode, looking for available networks.
-
Once node 0xffff detects the WES beacon from node 0x0020 it will send a WES setup request, which looks like this:


“Ooops that didn’t work”
-
Node 0xffff will keep sending these requests until either it is configured or the WES server beacons is disabled. We can proceed now with the setup of the unconfigured node. Please note the payload of the setup request message. The requestee node sends it's unique ID to the WES server node. (What is the unique ID? )
-
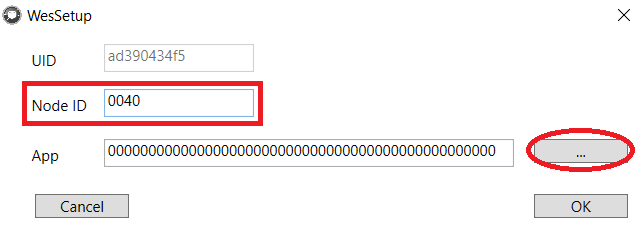
Click the "Setup" button assigned to the unconfigured node, on the "Device WES requests" panel and observe a settings panel pop up.
-
Type the desired Node ID for the newly joining module in the "node ID" field. If you wish to configure the settings for the generic application, click the button next to the "App" text field. Alternatively, the hex string representing the settings for the generic application can be copy-pasted in the text field.
-
Once the above steps are complete, click the "Ok" button. The following message shall appear in the "Device communications Log" of the WES server node:

-
With this the configuration of the new node is done. Stop the WES server with the "Stop" button under the "WES server control" tab, open an instance of the "Config App" and watch the new node beeing integrated into the NeoMesh network.
Congratulations! You have configured a module through WES.“Ooops that didn’t work”